When considering home improvement projects, ceilings often don’t get the attention they deserve. But imagine transforming your plain, dull ceiling into a charming, stylish focal point without breaking the bank. Enter beadboard ceilings! These panels can instantly add a touch of elegance and character to any room. If you’re looking for cost-effective solutions to upgrade your ceiling, you’re in the right place. Let’s explore various beadboard ceiling options that cater to every budget.
Discover cost-effective beadboard ceiling solutions that suit every budget. Enhance your home’s aesthetics with affordable, stylish beadboard options.
Introduction to Beadboard Ceilings
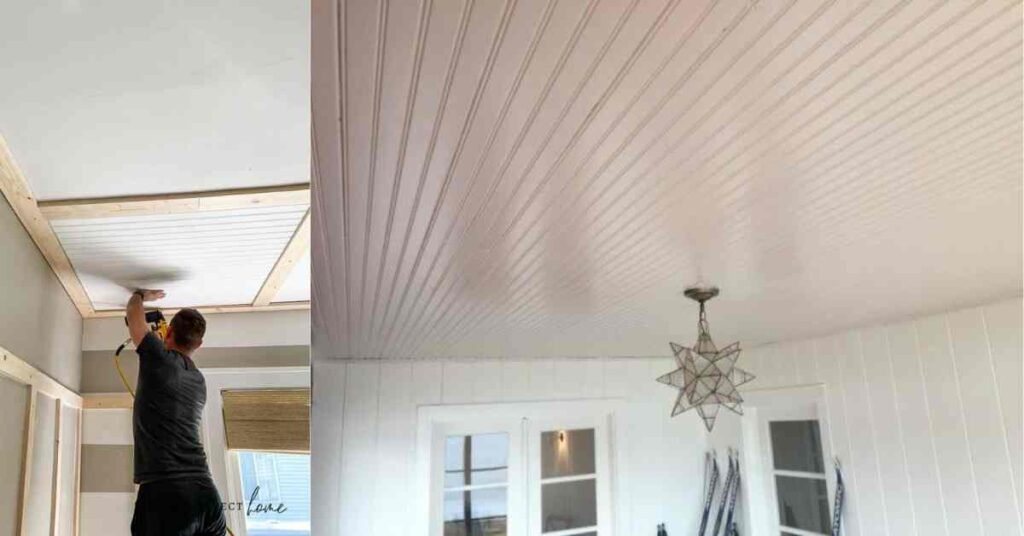
Beadboard is a type of paneling that features vertical grooves (or beads) at regular intervals. Originally used as a wall covering in traditional homes, beadboard has found its way to ceilings, adding a timeless appeal. Whether you own a cottage-style home or a modern apartment, beadboard ceilings can complement various interior styles.
Why Choose Beadboard Ceilings?
Why should you consider beadboard for your ceiling makeover? Here are a few reasons:
- Aesthetic Appeal: Beadboard brings a touch of classic charm to any room.
- Versatility: Suitable for kitchens, bathrooms, living rooms, and even porches.
- Affordability: Various price points to fit different budgets.
- Ease of Installation: DIY-friendly for those who enjoy home improvement projects.
Types of Beadboard Materials
Beadboard comes in several materials, each with its own benefits and price range:
- MDF (Medium-Density Fiberboard): Cost-effective and easy to paint, ideal for indoor use.
- PVC (Polyvinyl Chloride): Moisture-resistant, perfect for bathrooms and kitchens.
- Wood: Offers natural beauty and durability but can be pricier.
- Plywood: A budget-friendly alternative to solid wood, providing a similar look.
Cost Breakdown of Beadboard Ceilings
Understanding the cost is crucial for planning your beadboard ceiling project. Here’s a breakdown:
- Materials: MDF and PVC are generally more affordable, while wood and high-quality plywood are on the higher end.
- Size of the Area: Larger spaces will obviously require more materials.
- Installation: DIY projects save labor costs, but professional installation ensures a flawless finish.
Estimated Costs:
- MDF Beadboard: $0.50 – $1.00 per square foot
- PVC Beadboard: $1.50 – $3.00 per square foot
- Wood Beadboard: $2.00 – $4.00 per square foot
- Installation: $2.00 – $5.00 per square foot (if hiring professionals)
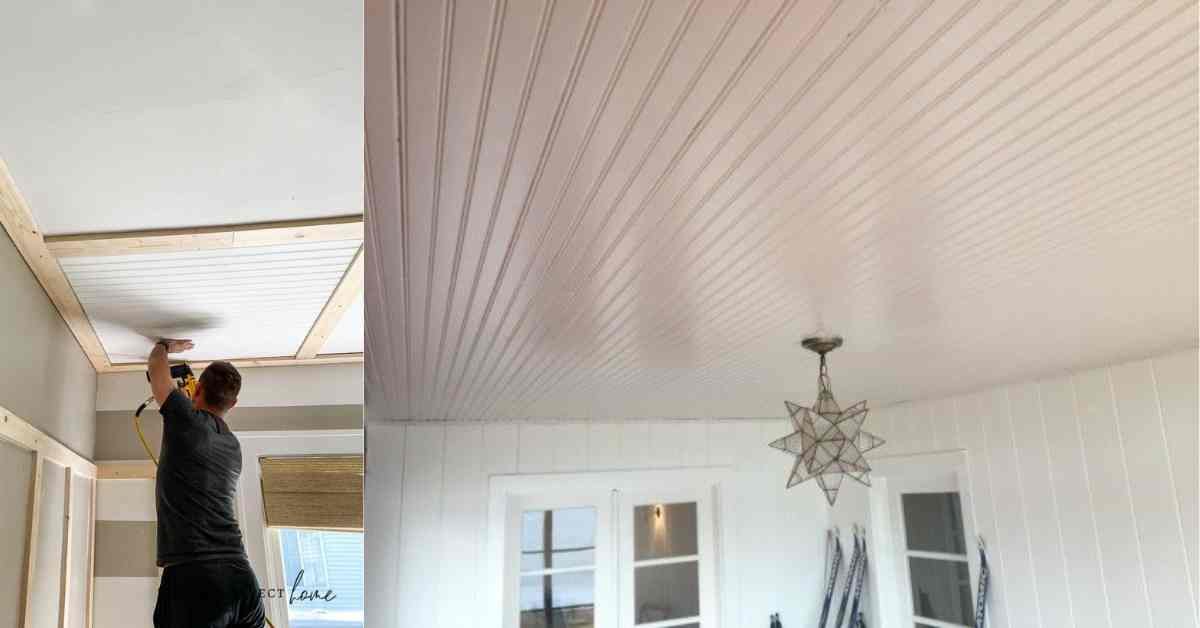
DIY Beadboard Ceiling Installation
Installing beadboard yourself can be a rewarding and cost-saving project. Here’s a step-by-step guide:
- Measure and Cut: Measure the ceiling area and cut beadboard panels to fit.
- Prep the Ceiling: Ensure the ceiling surface is clean and smooth.
- Install Panels: Start from one corner, applying adhesive to the back of the panels and securing them with nails or screws.
- Finishing Touches: Fill nail holes and seams with wood filler, sand smooth, and paint or stain as desired.
Tools Needed:
- Measuring tape
- Saw (for cutting panels)
- Adhesive
- Nails or screws
- Wood filler
- Sandpaper
- Paint or stain
Professional Installation: When to Hire Help
While DIY installation is feasible, hiring professionals can save time and ensure a polished result, especially for larger or more complex projects. Consider professional help if:
- You lack the necessary tools or experience.
- The ceiling has structural issues that need addressing.
- You want a high-quality finish without the hassle.
Beadboard Ceiling Maintenance
Maintaining your beadboard ceiling is relatively straightforward:
- Regular Cleaning: Dust and clean the surface with a damp cloth.
- Repainting: Repaint every few years to keep it looking fresh.
- Inspect for Damage: Check for signs of moisture damage or warping, especially in areas like bathrooms and kitchens.
Enhancing Beadboard Ceilings with Paint and Stain
Personalize your beadboard ceiling with a splash of color or a rich stain. Here’s how:
- Painting: Choose a color that complements your room’s decor. White is a popular choice for a classic look, while bold colors can add a modern twist.
- Staining: Staining highlights the natural wood grain, adding warmth and character.
Steps to Paint or Stain:
- Prepare the Surface: Sand the beadboard lightly to ensure paint or stain adheres properly.
- Apply Primer: If painting, start with a primer to seal the wood.
- Paint or Stain: Apply your chosen paint or stain in thin, even coats.
- Finish: Seal with a clear topcoat for durability.
Creative Applications for Beadboard Ceilings
Beadboard isn’t just for ceilings! Get creative with these applications:
- Accent Walls: Create a focal point in any room.
- Kitchen Backsplashes: Add charm and protect your walls.
- Bathroom Wainscoting: Moisture-resistant beadboard is ideal for this application.
- Cabinet Fronts: Give your cabinets a makeover with beadboard panels.
Comparing Beadboard with Other Ceiling Options
How does beadboard stack up against other popular ceiling treatments?
- Drywall: More common and less expensive but lacks the charm of beadboard.
- Plaster: Traditional and elegant but costly and labor-intensive.
- Tin Tiles: Stylish and durable but can be expensive.
- Drop Ceilings: Practical for basements and offices but not as visually appealing.
Budget-Friendly Tips for Beadboard Ceiling Projects
Saving money on your beadboard ceiling project is easier than you think:
- Opt for MDF or PVC: These materials are budget-friendly and versatile.
- DIY Installation: Save on labor costs by doing it yourself.
- Shop Sales: Look for discounts at home improvement stores.
- Buy in Bulk: Purchasing larger quantities can reduce the price per panel.
- Repurpose Materials: Use leftover beadboard from other projects.
Conclusion
Transforming your ceiling with beadboard is an affordable way to add style and character to your home. Whether you opt for a DIY approach or hire professionals, beadboard ceilings can fit any budget and aesthetic preference. With the right materials, tools, and a bit of creativity, you can achieve a stunning result that enhances the beauty and value of your home.
Frequently Asked Questions (FAQs)
1. How much does it cost to install a beadboard ceiling?
The cost varies depending on the material and whether you do it yourself or hire professionals. On average, it ranges from $2.00 to $5.00 per square foot for installation.
2. Can beadboard be used in bathrooms?
Yes, beadboard, especially PVC beadboard, is moisture-resistant and ideal for bathrooms.
3. Is beadboard easy to install?
Yes, beadboard is relatively easy to install, making it a popular choice for DIY projects. Basic carpentry skills and tools are needed.
4. How do I maintain a beadboard ceiling?
Regular cleaning with a damp cloth and periodic repainting or staining will keep your beadboard ceiling looking fresh and beautiful.
5. What are the benefits of using beadboard over other ceiling materials?
Beadboard adds aesthetic appeal, is versatile, affordable, and easy to install and maintain compared to other ceiling options like plaster or tin tiles.
By following these tips and insights, you’ll be well on your way to achieving a beautiful beadboard ceiling that enhances your home’s charm and character.